Friday 17 May 2013

Pulse

Went to Pulse London Gift and Homeware show (www.pulse-london.com). Absolutely loved the feel of it. Lots of exhibitors were keen to talk to us even knowing we were students not looking to buy.

My favourite part of the show was Launchpad....an area dedicated to graduate and upcoming designers. Things like jewellery, greetings cards made out of paper containing plantable seeds along with graphic printed cushions and home accessories made the show fun and new. I also loved Bonnie Bling's acrylic Scottish slang jewellery (www.bonniebling.co.uk). Oh how I would love to be there one day *goes off into a daydream* ;)


Friday 10 May 2013

Placement and Shape

Been designing various shapes of embellishment that reflect my theme of sea-life and coastal textures, such as scallop-like edged pieces and fish scale surfaces. I have then created the base fabric and started to experiment with shape by pinning pieces onto a mannequin.

I've decided I really like cluster embellishments on shoulders such as suffolk puffs or stiffened fabrics, so that the accessory appears dramatic almost costume like. After experimenting with using printed fabric (representing a shirt) and embellishment on top, I have decided that printed shirt is perhaps suitable as a partner for smaller pieces of decoration but not some of the more sculptural samples.

I also like the effect that an embellishment can create by almost dripping down the front of a garment or draping like a collar-reminds me of my pictures of lime on cliff fronts (see textures at Seaside entry).

The placement of decoration on the back of a garment is also interesting to me, although I think I should focus my concentration on front placements for this project.


Final Boards: Mer'Laidy Collection


Mer'Laidy Collar- Very happy with results, especially considering this is my first attempt at sewing a finished garment. I want to continue developing the skills I have acquired.

Marbled crochet with beading and Suffolk Puff details

Close up of Seahorse print sewn into collar with beading and applique.


Section of my modern "lace" created through melting and machine embroidery.


Words are a definite inspiration for me as is myth and magic...this is how I ended up with a mermaid theme from studying sealife.

Collection of textured drawings that inspired my collection.

Selection of digital samples and embellishments

Context of my work

After getting my teeth sunk into this project I have found that there are many contexts in which my work fits.  I can imagine the Mer'laidy collar being used in editorial shoots and I would like to look further into setting up some editorial fashion photoshoots using this work, exploring how to go about loaning my work for shoots.

I can also see my work translating well into costume and prop design for example within the burlesque dancing scene bec (hats and masks) because there is a playful theatricality within my pieces.  I am also very interested in pursuing the fashion route, in terms of commercial prints and bespoke creations.  This Summer I want to look for a millinery course in order to gain skills so that I can push my sculptural forms further and into the accessories market.  This would also tie in with creating one off pieces for weddings and special events.  I'm also going to try and learn to cover/ upcycle shoes using print and improving on embroidery techniques.


My work could also step across into the interiors and arts market such as sculpture, bespoke wall coverings and lights/ lamps.

I think my pieces could market from £60 up depending on the size of the piece. The seahorse side of my collar took 5 full days to make not including the development of the print. This piece would obviously have to be sold at a high price in order to get out what I put in. The fact that my pieces would be bespoke and therefore more expensive means that my target customer will be someone looking to spend for that special item such as a bridal party or someone with a higher than average income.

Working on a finished piece

From my initial samples I have developed an idea that I want to create a collar/ draping neck adornment as one of my samples. This differs from my original plan which is not a problem because without that idea I may not have come to this conclusion. 

I have been experimenting with machine stitch, eliminating fabric via melting, beading and embroidery techniques.  It is very time consuming but I was so please with the result of my initial sampling that I wanted to refine and push it further.

For this piece I used my yellow fish print on polyester glazier and started zig-zag stitching with polyester cotton (because it's meltable) to create an outline based on the shapes of fish and fins. I then worked into it with stitch using metallic and standard threads to create a scale like appearance. After this process I used a soldering iron to melt patches away, in turn creating an alternative lace type appearance.  I started to add the sequins and pearls and then I had to pause and play around with placing shapes on the mannequin again.
Trying out shaped piece

Hand Embroidering sequins and beads


Playing around with background prints, it needed to be simple so I decided to leave the matching print as a possibility but focus on the embellishment.  Using an older sample on the right shoulder to get an ideaa of what works.  It needs to be more balanced than this, more symetrical.


I had been experimenting with using second hand crochet in my marbling so I started playing around with using this as a symetrical shape to the other side of my collar. I like the juxtaposing elements of the nearly solid polyester and the lacey crochet, even though they are almost symetrical in shape.


The print as the background here could be too much, will leave as an option and not attach.

I felt the shape of the polyester piece needed something extra so I tried out my seahorse print as an add on. It went on from here.

Slowly creating more balance in the lines


Imagining what kind of costume sleeve this could make....mermaid skin!


I started building up suffolk puffs on the shoulders stuffing them and leaving them flat so as to make the most of their two alternative qualities -of pleats and smoothness.


Finished Collar

History of the Collar

The ruff, an extension of a simple collar, that appeared in the 16th century was a form in fashion that grew in length and breadth after its introduction and took on symbolic as well as aesthetic meaning.
16th Century History Fashion - the Ruff, Conradus Vietor
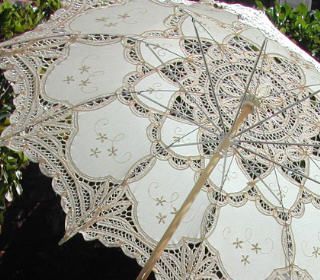
It grew out of the gathering of fabric at the neckline of the typical chemise, or undergarment, worn under outer layers of clothing. The chemise served to protect the outer garments from excessive wear and washing and were usually made of sturdier linen that could be bleached and cleaned with frequency. The collection of fabric at the neckline, that would be tied or cinched and form a small collar, would often stand out in its whiteness and in its fabric composition against the features of the wearer’s outer garments. By virtue of this initial distinction, it came to have an importance in its own right and the aesthetic language of the collar, or more elaborate ruff, broadened accordingly.


16th Century History Fashion - the ruff, Lady with Lace CollarThe ruff survived longest as an accessory in Holland, after evolving quickly and becoming a form separate from the chemise, where it also grew to the most extravagant sizes– cartwheel ruffs were popular there up until the mid-17th century and were often so wide, up to a foot and a half, as to require wiring to retain their shape. Otherwise, the shape of ruffs was maintained by use of starch. The rigidity of the ruff thus ensured that the wearer projected a dignified pose that, because of hindered movement, suggested a life of leisure and attendance to.

Women as well as men adorned themselves with the exaggerated ruffs, and it was women’s fashion that led to further adaptations in its style such as the opening of the form at the center to enhance femininity, if not to facilitate eating and movement. Eventually, the ruff gave way to the standing collar and gradually less expansive collars, but essentially paved the way for centuries of further enhancements and embellishments at the neckline..... 

Saturday 4 May 2013

Focus on Colour

I have a habit of using so many colours because it's what is all around me, it's what I wear. I rarely match shades and I often do this in my work too. Colour is an instinctive thing for me and to be honest I am always drawn to using pink somewhere within my work because it is my distinctive style. I genuinely think using it makes me more productive.

For this project I started off free with my colour and eventually narrowed it down to what I wanted, my little pony, stereotypical mermaid pastels combined with more grown up textures.

I have identified the 7 colours I think could be key in this project and sourced polyester threads to match.  I then experimented with combinations of colour and proportions to reflect different moods. This was partially beneficial but as I said earlier colour is an intinctive thing for me.


Development of drawing into print samples

I've been developing some more digital prints from my drawings. My emphasis has been less on the literal imagery and more on the way the colours and textures merge to create a suitable background fabric for my embellishments.

The circles are too flat- not enough texture to make up for the lack of colour. Too white. Could possibly use this as an experimental fabric but don't want to take this pattern any further. I also don't like the one off designs for use as my backing fabric, however could be good as a complimentary shirt fabric.


I lightened the designs on photoshop to create pastel colours and 'baby neons' as I've been calling them however some of the designs below have come out looking a bit dirty/ dark or dusky. These will be good as small Suffolk puff embellishments or cording etc.


This section of the print is more interesting than the print as a whole because this part has more depth. I've decided to focus more on the embellishments so I won't be taking this print any further but if I did in future I would look at developing this section.


The colours turned out very accurately in this piece which I developed from my initial drawing.


My favourite designs are the ones below. This one is developed from a drawings I did at the Sea-life centre (below) which I then put into repeat on photoshop. I think the layering on this print gives it depth and there is a good level of colour. I also think the polka dot adds to the decorative feel of the piece as well as reflecting the patterning of fish scales.